How can we help?
Having trouble? Click here to access our troubleshooting guide.
Your Question:
Climapro 2 Engineer Support
![]()
![]()
![]()
![]()
Fault Finding
How to pair a Climapro 2 RF Handset to the Receiver Unit
Climapro 2 RF Handset
The Climapro 2RF Handset runs off 4 x AA LR6 alkaline batteries. Ensure that the batteries are ok prior to following the pairing procedure.
If the signal is lost between the Climapro 2 RF and the Receiver Unit (e.g the batteries are flat) the boiler will run on its own temperature settings as a “fail safe”
Climapro 2 RF Receiver Unit

The Receiver Unit that is supplied with the Climapro 2RF comes with a short section of 2 core 0.75mm cable to allow the installer to wire it into the Glow worm “EBUS” connection on the appliance. This is normally used when the receiver can be clipped to the inside of the appliance (only an option on certain models). If the receiver is to be fitted outside of the appliance on the wall, the installer can use his own 2 core 0.75mm cable of up to 300 metres in length to connect the receiver to the appliance if required.
Climapro 2 RF Receiver Unit
(Shown with the top cover removed)
Diagram 1

How to pair the Climapro 2 RF Handset to the Receiver Unit
NOTE - Before starting the pairing process, please consult the Installation Literature that was supplied with the Boiler and the Climapro 1 RF for the specific wiring requirements. Also ensure that the cover of the receiver unit is removed to allow access to the Red & Green neon fault finding lights and the Receiver Pairing Button, as shown in Diagram 1. (Please note that if the front panel of the boiler needs to be removed to gain access to the receiver unit, it MUST be carried out by a qualified Gas Safe Registered engineer)
1 – Press and hold the “Menu” button on the Climapro 2 RF Handset for approximately 7 seconds until the screen shows “Installer Menu Access” at the top of the screen and “Access code 0” in the middle of the screen. Once this is shown, let go of the “Menu” button.
2 – Change the “Access Code 0” to “96” using the “Down” button, and then press the “OK” button to enter the “Installer Menu”
3 – With the “Down” button scroll down to ”RF” and then press the “OK” button once to enter the “Radio” menu.
4 – Press the “OK” button once on “Pairing” and the screen will say “Launch the pairing procedure on the RF receiver or Systempro and press OK key”
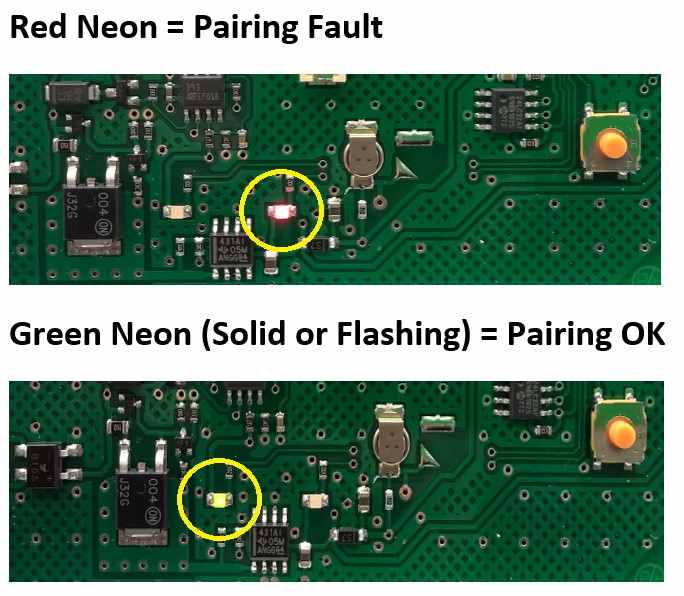
5 – At this point you need to press the “OK” button on the Climapro 2 RF handset ONCE and release it, but SIMULTANEOUSLY press and HOLD the yellow pairing button on the Receiver Unit for 10 seconds until the Green Neon light on the receiver starts to flash. The screen on the Climapro 2 RF Handset will show “Connection In Progress” during the pairing procedure.
6 – If the pairing procedure has been completed successfully, the Green Neon on the Receiver Unit will be either solid or flashing, the Red Neon on the Receiver Unit will be off, and the screen on the Climapro 2 RF Handset will show “Connection Finished”
7 - If a solid Red Neon is shown on the Receiver Unit after the pairing procedure, or the screen on the Climapro 2 RF shows “Connection Error” then this would indicate there is a fault (See the Troubleshooting section for further details)
8 – To return back to the user screen on the Climapro 2 RF after a successful pairing procedure, press the “Back Arrow” button twice, then press and hold the “Menu” button for approximately 3 seconds.
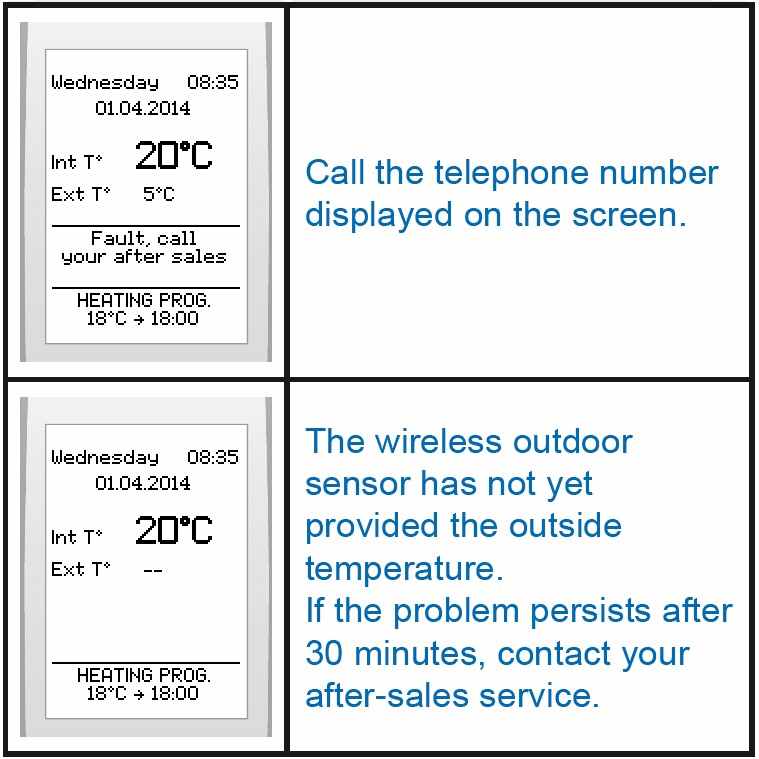
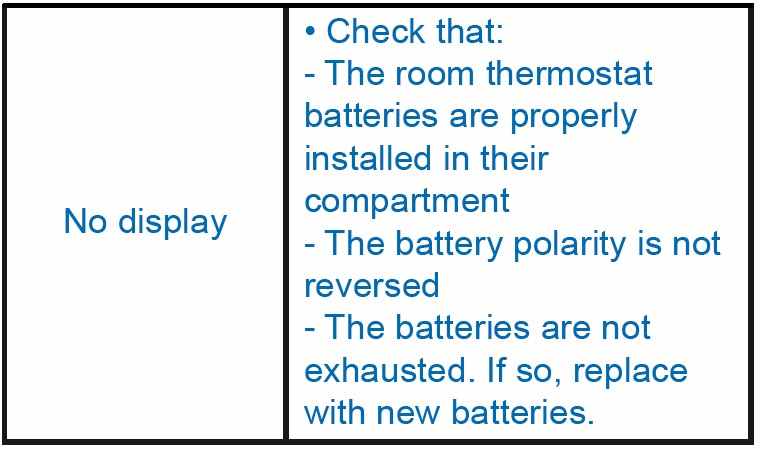
Troubleshooting
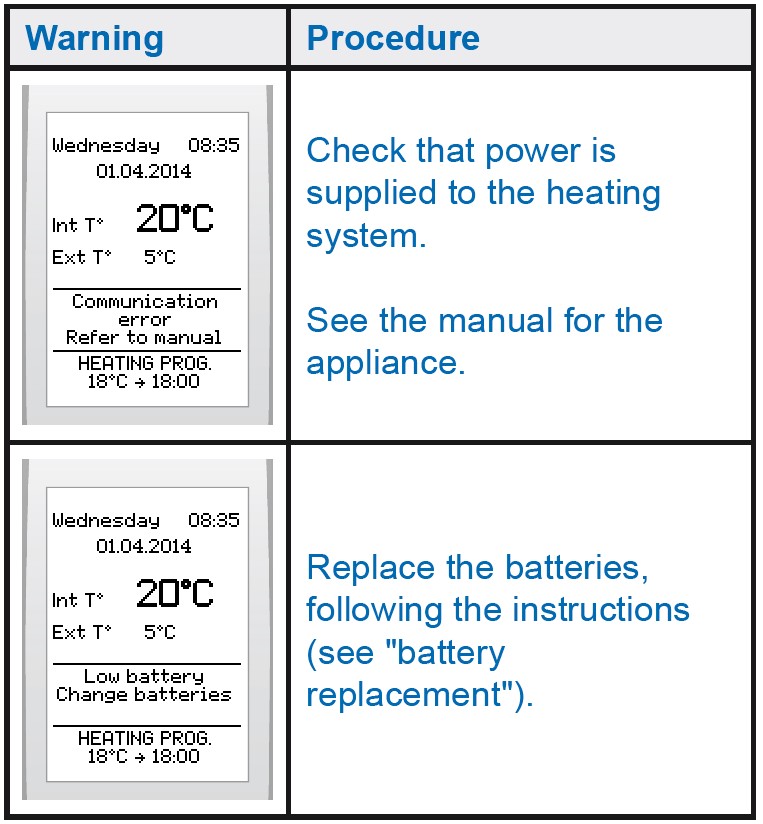
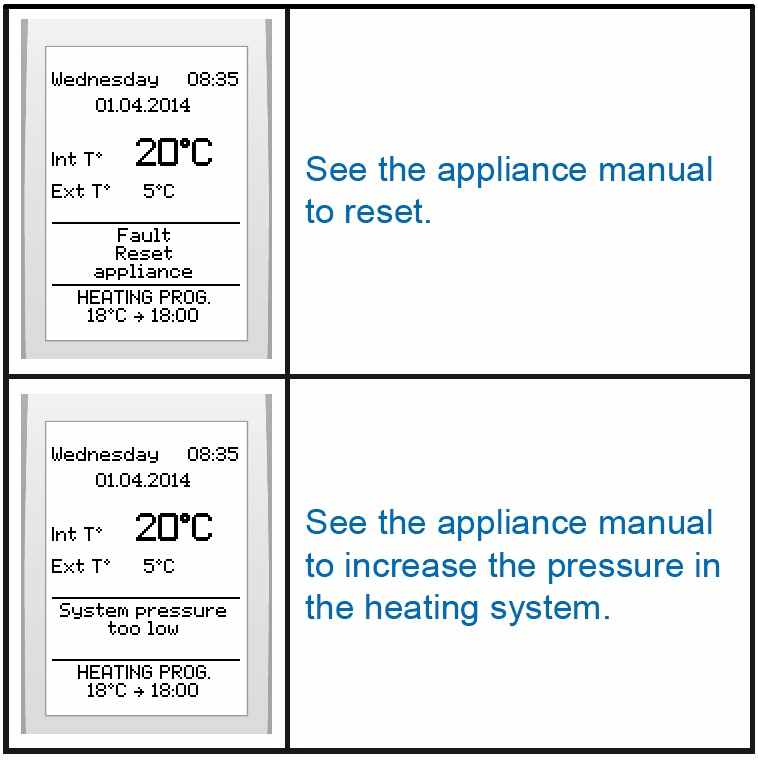
This section contains all the messages that the thermostat may display, and the corrective actions that you can carry out to put the appliance back into service.
If after carrying out this basic advice your appliance still does not work, leave it turned off and contact a qualified engineer.
![]()
Technical Specification
Coming Soon.
![]()
Wiring Schemes
Coming Soon.
![]()